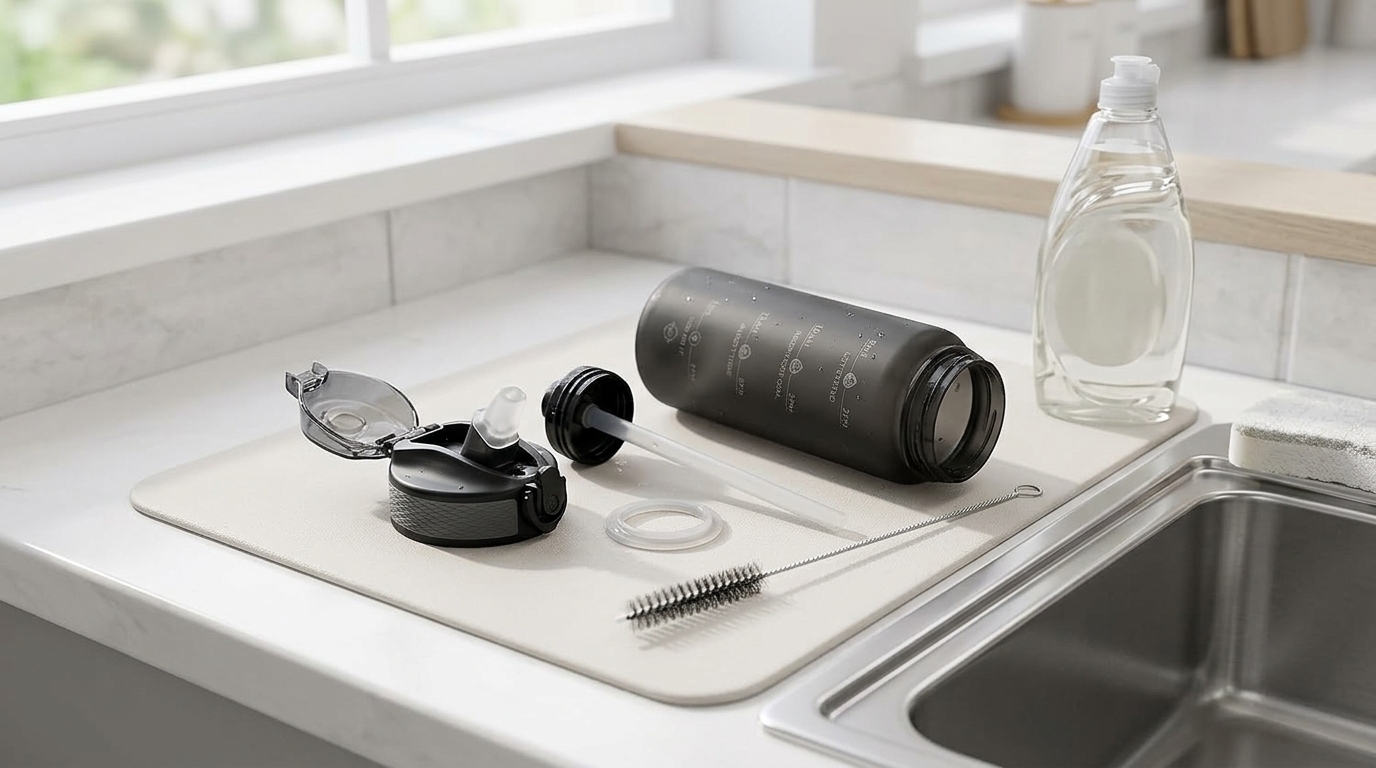
Straw-lid water bottles are convenient—but they also have hidden “trap zones” where moisture and residue linger: inside the straw, under the bite valve, around silicone gaskets, and in lid threads. If you’ve ever washed the bottle and it still smelled the next day, it’s almost always one of those parts.
Hyeta pick
A simple place to start
If you want a practical motivational water bottle with time markers, a straw lid, and a carry strap, compare the current Hyeta options before you choose a size.
This guide shows exactly how to clean a water bottle with a straw so it doesn’t smell or grow mold, with a realistic routine you can stick to: a quick daily wash and a weekly deep clean with full lid disassembly.
What you’ll need (simple tools that work)
- Dish soap (warm, soapy water does most of the work)
- A straw brush (or a small bottle/straw brush set)
- A small detailing brush or soft toothbrush (for threads and crevices)
- Optional: baking soda or white vinegar for odors (details in the FAQ)
- Clean towel + drying rack (drying is half the battle)
If you’re shopping for a straw bottle and want one that’s easy to use daily, you can also check the Hyeta bottle on Amazon to see the current colors and listing details.
Daily routine (3–5 minutes): quick wash + thorough drying
This is the routine that prevents most smells before they start. Do it daily if you use your bottle daily—especially if you drink anything besides water.
Step 1: Rinse immediately after you finish
Don’t let a closed, damp straw lid sit overnight. A fast rinse prevents residue from drying inside the straw and around the bite valve.
Step 2: Warm soapy wash (bottle + lid)
- Fill the bottle halfway with warm water + a few drops of dish soap.
- Close, shake, and pour out.
- Wash the outside and the drinking area with a soapy sponge or brush.
Step 3: Quick clean the straw (the part most people skip)
Run warm soapy water through the straw and, if possible, give it a couple of passes with a water bottle straw brush. It only takes 15–30 seconds and makes a huge difference for odor prevention.
Step 4: Air-dry completely (lid separated, straw open)
- Set the bottle upside down on a drying rack.
- Leave the lid open and separate pieces if you can (at minimum, open the spout/bite area).
- Let the straw drain and dry with airflow. If it’s still wet inside, smells tend to return.
Drying tip: If your bottle has a carry handle or flip lid, don’t latch it shut while drying. Closed lids trap moisture and create the “musty” smell loop.
Weekly deep clean (15–25 minutes): full lid disassembly
If you want to know how to clean a straw lid water bottle properly, this is the step that matters most. Weekly is a good baseline for water-only use; increase frequency if you use electrolytes, flavored drinks, or notice odor returning faster.
Step 1: Disassemble the lid (straw, bite valve, gasket)
Each brand is a little different, but most straw lids have these parts:
- Straw (the tube you sip through)
- Bite valve/spout (the mouthpiece)
- Silicone gasket/seal (often a ring seated inside the lid)
- Lid threads and internal channels (where grime and odor hide)
Carefully remove the silicone gasket if your lid design allows it. This is one of the most common sources of persistent odor.
Step 2: Soak small parts in warm soapy water
Place the straw, valve, and gasket in a bowl of warm water with dish soap for 10–15 minutes. This loosens residue so brushing is easier (and more effective).
Step 3: Scrub the straw and valve (use the right brush size)
- Run a straw brush through the straw several times from both ends.
- Scrub the bite valve/spout, paying attention to seams and any slit openings.
- Use a small detailing brush/toothbrush around the lid’s inner channels and threads.
If you’re dealing with recurring smells, it can help to compare a fresh bottle setup and care details—see the latest price on Amazon for the Hyeta 32oz straw bottle and check what parts are included with the lid design.
Compare before you buy
Check colors, sizes, and current price
Availability and colors can change, so it is worth checking the live Amazon listing before you decide.
Step 4: Rinse like you mean it (soap film can hold odor)
Rinse each part under running water until it feels squeaky-clean (no slippery soap film). Make sure water flows freely through the straw.
Step 5: Optional sanitize step (only when needed)
If you see black spots or the bottle smells musty even after scrubbing, you can add a conservative sanitize step:
- Vinegar rinse: Soak straw/valve/gasket in a mix of white vinegar and water, then rinse very thoroughly.
- Baking soda wash: Use a baking soda + water paste for odor on hard surfaces, then rinse well.
Important: Avoid mixing vinegar and bleach, and avoid harsh cleaners that could damage plastics or silicone. When in doubt, stick to dish soap + brushing + drying, and replace worn parts.
Step 6: Dry completely before reassembly (this prevents odor return)
Learning how to dry a straw lid is just as important as washing it:
- Shake out excess water from the straw.
- Stand the straw vertically (or lay it on a rack) so airflow can reach the inside.
- Leave the lid pieces separated until everything is fully dry.
Troubleshooting: smell, mold, and “dishwasher didn’t fix it”
| Problem | Most likely cause | What to do |
|---|---|---|
| Still smells after washing | Silicone gasket/seal holding odor; moisture trapped in lid channels | Disassemble the lid, remove and scrub the gasket, brush threads/crevices, then air-dry fully before reassembly |
| Black spots on straw/valve | Residue + moisture buildup (possible mold/mildew) | Stop using until cleaned; disassemble, scrub all parts, consider a vinegar soak, rinse thoroughly, and dry completely. Replace any part that stays stained or smells |
| Dishwasher didn’t fix it | Dishwasher water may not reach tight lid crevices; gasket and valve areas still dirty | Hand-clean the lid parts with a straw brush and detailing brush; focus on the bite valve, gasket seat, and lid threads |
| Leak started recently | Gasket not seated properly; gasket stretched/cracked; residue on seal | Remove gasket, clean the groove, reseat carefully. If it keeps leaking, replace the gasket |
How often should you deep clean a straw water bottle?
- Daily: Quick warm soapy wash + thorough air-drying (especially the lid open).
- Weekly: Full disassembly deep clean (straw, bite valve, gasket, lid threads).
- More often (2–3x/week): If you use flavored drinks, protein, smoothies, or electrolyte mixes—these can leave residues that feed odors faster.
When to replace the straw, bite valve, or gasket
Sometimes the best “cleaning” is replacement—especially if parts are worn or permanently odor-stained.
- Replace if the straw stays cloudy/slimy even after brushing.
- Replace if the bite valve has cracks, feels sticky, or holds odor.
- Replace if the gasket is stretched, warped, or no longer seals consistently.
- Replace if you can’t remove a musty smell after a thorough scrub + full dry cycle.
If you’re ready to start fresh with a straw bottle designed for everyday use, you can compare current colors on Amazon for the Hyeta 32oz motivational straw bottle.
FAQ
Vinegar vs. baking soda: which is better for bottle odors?
Both can help, but for different situations:
- Vinegar (diluted) is often used as a deodorizing rinse for musty smells in hard-to-reach areas like straws and valves—follow with very thorough rinsing and drying.
- Baking soda is helpful as a gentle abrasive/deodorizer for surfaces and can be made into a paste for the lid threads or the bottle mouth—rinse well so no residue remains.
If you’re seeing black spots, prioritize disassembly, scrubbing, rinsing, and drying. If stains or smells persist, replacing the affected part is the safest, simplest option.
Are straw-lid water bottles dishwasher-safe?
It depends on the brand and the specific lid parts. Many bottles can handle the dishwasher, but straw lids and silicone pieces often have crevices where detergent and residue can linger, and heat can wear parts faster over time. If you use the dishwasher, it’s still smart to do a weekly hand-clean of the lid’s bite valve, gasket seat, and straw.
How do I dry a straw lid fast without the smell coming back?
- Separate parts so air can circulate.
- Shake out the straw and stand it so water drains.
- Leave the lid open and don’t reassemble until everything is fully dry to the touch.
How do I remove mold from a straw?
First, stop using the bottle until it’s addressed. Disassemble the lid, scrub the straw thoroughly with a straw brush, and clean the bite valve and gasket. If needed, use a vinegar-and-water soak, then rinse extremely well and let everything dry completely. If the straw remains stained, smells, or you can’t confidently clean it, replace it.
Bottom line
If you take away one thing: cleaning the bottle isn’t enough—the lid parts are the real problem area. A quick daily wash plus a weekly disassembly deep clean (straw, bite valve, gasket, and threads) will prevent most odors and reduce the chances of mold returning.
And if you’re upgrading your daily carry, you can check the Hyeta 32oz straw bottle on Amazon to see the current options.