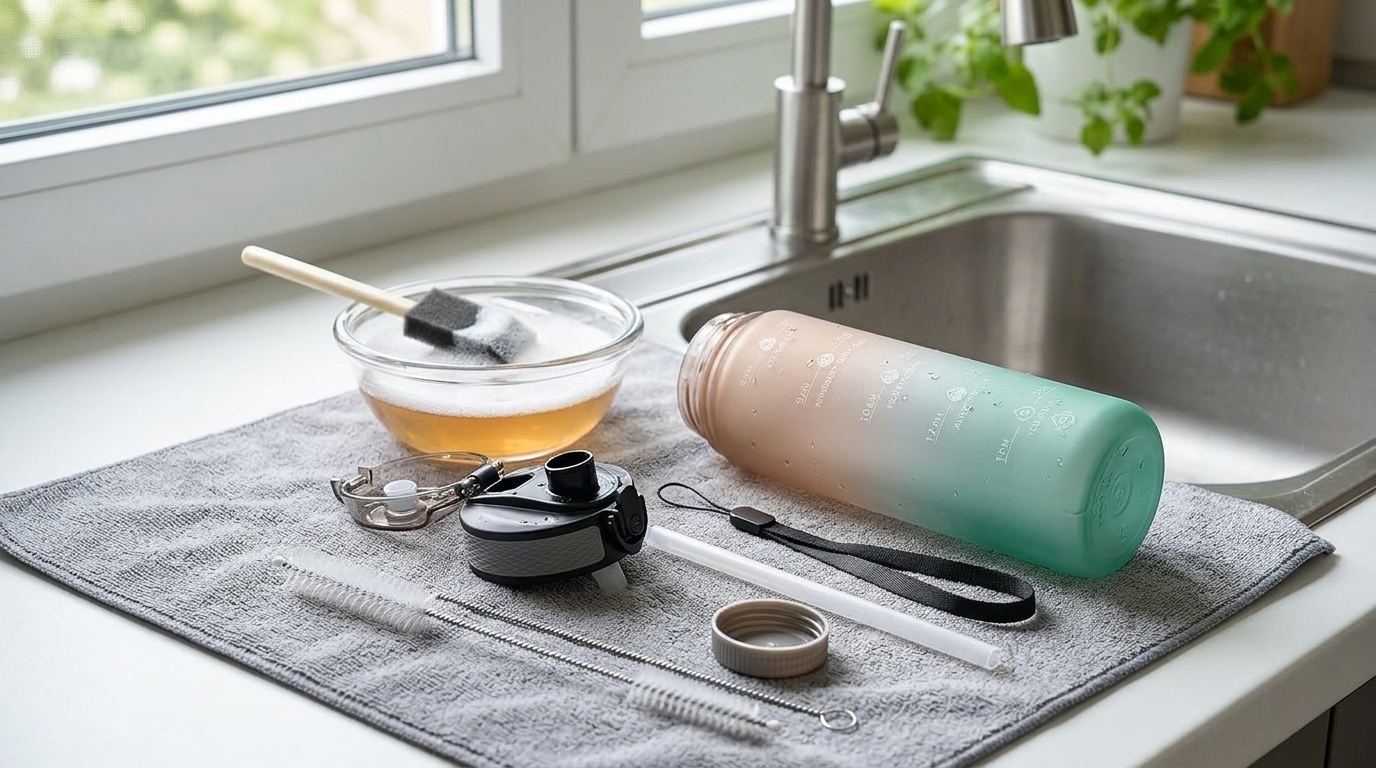
Straw-lid water bottles are convenient, but they can start to smell “off” faster than simple screw-top bottles. The reason isn’t mysterious: straw lids have more hidden surfaces, tiny seals, and narrow channels that stay damp long after you think the bottle is dry.
Hyeta pick
A simple place to start
If you want a practical motivational water bottle with time markers, a straw lid, and a carry strap, compare the current Hyeta options before you choose a size.
This guide walks you through a practical, brand-agnostic routine: a quick daily reset plus a weekly deep clean focused on the straw, valve, and gasket (the usual sources of mold and lingering funk).
Why straw lids get funky faster
- Moisture gets trapped in the straw, mouthpiece, and valve housing.
- Limited airflow inside the lid creates a damp environment where odor builds.
- Small seals (gaskets/O-rings) can hold residue from flavored drinks, coffee, or electrolyte mixes.
- Backwash happens (tiny bits of saliva and drink residue can end up inside the straw and valve).
What you need (simple, effective tools)
You don’t need a complicated setup. These basics cover most straw-lid bottles:
- Dish soap (mild, unscented is ideal if you’re odor-sensitive)
- Warm water
- Straw brush (long, flexible brush sized for your straw)
- Small detail brush or a clean, dedicated toothbrush (for threads, crevices, valves)
- Optional: cleaning tablets made for bottles/straws (handy for travel or stubborn smells)
- Clean towel or drying rack for full air-drying
If you’re shopping for a straw-lid bottle that’s designed for everyday use, you can check the Hyeta bottle on Amazon and see the current options.
Quick daily routine (2–3 minutes)
This is the routine that prevents most “mystery smells” from ever starting.
- Empty and rinse ASAP. As soon as you’re done for the day, pour out leftovers and rinse the bottle and lid with warm water.
- Soap wash the lid contact points. Put a drop of dish soap on a sponge or brush and quickly scrub the mouthpiece area and lid underside.
- Flush the straw. Draw warm, soapy water through the straw (if your lid design allows), then flush with clean warm water.
- Air-dry fully. Set the bottle upside down and let the lid dry separately. If possible, store the lid open so the mouthpiece and valve can dry out.
Daily rule of thumb: If the lid still feels damp inside after a few hours, it needs more airflow (or a deeper clean).
Weekly deep clean: step-by-step (no mold, no funk)
Plan on doing this about once a week for water-only use, and more often if you use flavored drinks, smoothies, or anything sweet.
Step 1: Disassemble the straw lid (don’t skip the small parts)
Most straw lids have some combination of:
- Straw (silicone or plastic)
- Mouthpiece (flip/pull spout or bite valve)
- Valve (sometimes inside the lid to prevent leaks)
- Gasket/O-ring (a rubber/silicone seal seated in a groove)
Carefully remove what’s designed to be removed. If the gasket comes out easily, take it out for cleaning. If it’s clearly fixed in place and you’d have to force it, clean around it thoroughly instead.
Step 2: Make a warm, soapy soak
Fill a bowl or your sink with warm water and a small squirt of dish soap. Add the lid parts (straw, valve, gasket) and let them soak for 10–20 minutes.
Compare before you buy
Check colors, sizes, and current price
Availability and colors can change, so it is worth checking the live Amazon listing before you decide.
Optional odor boost: If smells linger even after soap, follow your bottle-cleaning tablet directions (different brands have different soak times). Tablets can be especially helpful for straws and valves with tiny channels.
Step 3: Brush every channel (this is where the odor hides)
- Straw: Run a straw brush through the entire length several times until it feels squeaky-clean.
- Lid + mouthpiece: Use a small brush/toothbrush to scrub the threads, underside, and any textured grips.
- Valve housing: Brush any openings and crevices. If the valve is removable, clean both sides and the seat where it rests.
- Gasket/O-ring: Gently scrub all sides, especially the groove it sits in (biofilm often builds up there).
If you’re using a straw-lid bottle daily and want a convenient backup for rotation while one dries completely, you can compare current colors on Amazon for the Hyeta 32oz straw bottle.
Step 4: Rinse until there’s zero soap smell
Rinse each part under running water. For straws and lids with channels, flush water through until you can’t smell soap at all—soap residue can create its own “off” taste later.
Step 5: Dry completely (the most underrated step)
Drying is mold prevention. Even a well-washed straw lid can start smelling again if it stays damp.
- Shake out excess water from straws and valves.
- Lay small parts on a clean towel where air can circulate.
- Let the lid dry upright and open (or with the spout open) so the interior can ventilate.
- Wait until everything is fully dry before reassembling.
Mold prevention checklist (simple habits that work)
- Don’t leave flavored drinks overnight. Sugar, sweeteners, and milk proteins can feed odor and residue buildup quickly.
- Rinse immediately after anything besides water. Even “lightly flavored” mixes can cling to silicone parts.
- Rotate lids or bottles if you can. Giving a lid a full day to dry is a big win for smell prevention.
- Replace worn parts. If a straw is permanently cloudy/slimy or a gasket stays smelly after deep cleaning, it may be time to replace it.
- Don’t store it sealed when wet. Closed + damp is the perfect recipe for funk.
Troubleshooting common straw-lid problems
Black spots (possible mold) on the straw or gasket
- Stop using the bottle until cleaned.
- Disassemble and deep clean all parts, focusing on the gasket groove and valve seat.
- If black spots don’t scrub off or the material looks stained/etched, consider replacing that part (especially soft silicone straws or gaskets).
If you’re in the market for a fresh daily bottle to start with a clean baseline, you can see the latest price on Amazon for the Hyeta 32oz straw bottle.
Sticky valve or hard-to-open mouthpiece
- Soak the mouthpiece/valve in warm soapy water for 15–20 minutes.
- Brush around the valve edges and the seat where it seals.
- Rinse thoroughly—leftover soap film can also feel “sticky.”
Squeaky seals or a lid that suddenly feels “grabby”
- Remove and clean the gasket and the groove it sits in (residue often causes squeaking).
- Make sure the gasket is re-seated evenly and not twisted.
- If the gasket is stretched, cracked, or flattened, replace it for a reliable seal.
Still smells after cleaning
- Repeat the deep clean and spend extra time brushing the straw and valve channels.
- Try a bottle cleaning tablet according to the instructions (helpful for odor trapped in small passages).
- Let every part dry completely for 24 hours before reassembly (odor often fades once fully dry).
FAQ
Can I put straw lids in the dishwasher?
Sometimes—many straw lids are marketed as dishwasher-safe, but designs vary a lot. Dishwashers can also leave moisture trapped in valves and straws if parts aren’t positioned for airflow. If you do use a dishwasher, consider doing a quick post-cycle check: separate the parts and let them air-dry fully before reassembling.
Should I remove gaskets/O-rings when cleaning?
If the gasket is designed to be removable and comes out easily, removing it for weekly deep cleans helps prevent buildup in the groove. If you have to pry hard or you’re worried about tearing it, clean around it thoroughly and only remove it occasionally (or when you notice odor or residue).
What’s the best straw brush for a water bottle?
The best one is the brush that fits your straw snugly without forcing it—tight enough to scrub the inner walls, but not so tight that it gets stuck. A flexible, long brush works best for tall bottles and longer straws.
How often should I deep clean a straw water bottle?
For plain water, weekly is a good baseline. If you use electrolyte mixes, pre-workout, juice, or flavored drinks, you’ll usually want to deep clean more often—especially the lid, straw, and gasket.
Conclusion: clean, dry, and you’ll avoid 90% of the funk
If you remember just three things, make them these: disassemble the small parts, brush the channels, and dry everything completely. That combo prevents most straw-lid odors and helps you catch worn gaskets or straws before they turn into a recurring problem.
If you’re building a simple hydration setup for work, gym, or travel, you can also check the Hyeta 32oz water bottle with straw on Amazon to see what’s available right now.