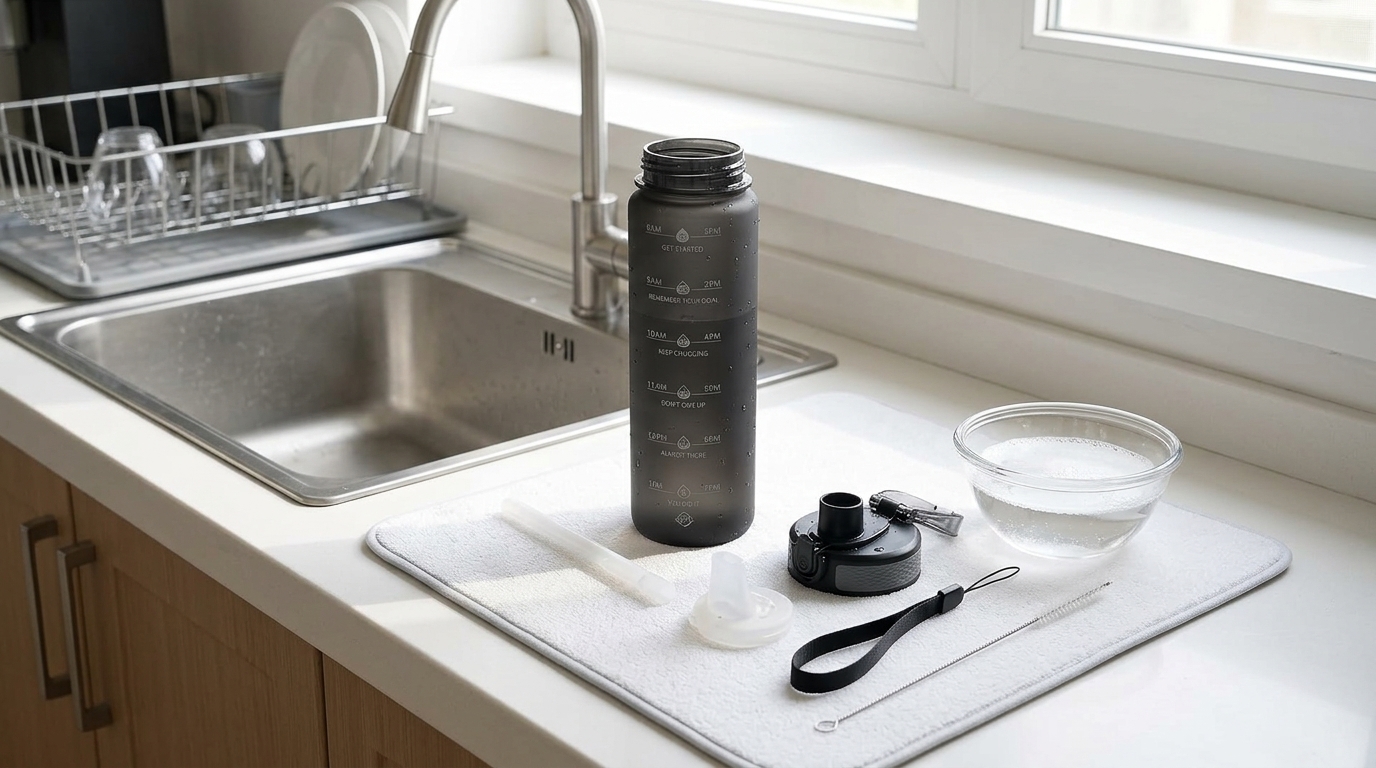
Mold in a water bottle straw or lid is gross—but it’s also common, because those parts trap moisture in tight spaces. The good news: in many cases you can clean it safely with simple tools, good technique, and thorough drying. The key is taking the lid apart (as much as the design allows), scrubbing every hidden channel, and knowing when it’s smarter to replace a gasket, straw, or the whole lid.
Hyeta pick
A simple place to start
If you want a practical motivational water bottle with time markers, a straw lid, and a carry strap, compare the current Hyeta options before you choose a size.
If you’re shopping for a bottle you can fully disassemble and maintain, you can check the Hyeta 32oz straw bottle on Amazon and compare current options.
Why mold forms in straw lids (even when the bottle looks clean)
Mold needs moisture, a surface to cling to, and time. Straw lids provide all three—especially in places you can’t easily see. The most common trouble spots are:
- Inside the straw (especially if you sip and set it down without rinsing)
- Mouthpiece and spout crevices where water pools
- Under removable gaskets/O-rings and in gasket channels
- Flip-top hinges, vent valves, and inner lids where condensation sits
- Threads and sealing surfaces that stay damp after washing
Even if you only drink water, saliva and backwash can introduce organic material that helps growth. Sugary drinks (including flavored water or electrolyte mixes) increase risk because residue feeds microorganisms.
Before you start: safety-first prep
What you’ll need
- Warm water + dish soap
- A straw brush (long and narrow)
- A small detail brush (or clean, dedicated toothbrush) for gasket grooves
- Clean towels and/or a drying rack
Optional: a soak solution appropriate for your lid materials (details below).
Quick cautions (to avoid damaging parts)
- Don’t mix cleaners (for example, bleach and vinegar together can create irritating fumes).
- Don’t rely on a “quick rinse.” Mold in a water bottle straw usually requires scrubbing.
- Heat can warp plastics or weaken seals. If you’re unsure whether parts are dishwasher-safe, default to hand-washing with warm (not boiling) soapy water.
- If you have respiratory sensitivities, consider wearing gloves and cleaning in a well-ventilated area.
Step-by-step: how to clean mold in a water bottle straw and lid
This is a brand-agnostic routine that works for most straw lids. Adjust based on your bottle’s instructions when available.
Step 1: Disassemble the lid completely (as designed)
Take apart every removable piece you can access:
- Remove the straw (and any straw connector)
- Pop out silicone gaskets/O-rings (often on the underside of the lid and around the spout)
- If your lid has a valve or vent plug, remove it carefully
Tip: Take a quick photo before disassembly so you can reassemble correctly.
Step 2: Pre-rinse to flush loose debris
Run warm water through the straw and lid channels to remove loose residue. This makes the scrub step more effective.
Step 3: Wash with hot/warm soapy water and brushes
Use dish soap and the hottest water that’s safe for your parts (warm-to-hot is usually fine for handwashing).
- Straw: Push the straw brush through end-to-end several times. Rotate as you scrub.
- Mouthpiece/spout: Use a small brush to work into seams and corners.
- Gasket channels: Scrub the groove where the gasket sits—this is a common “invisible mold” zone.
- Underside of lid: Pay attention to recesses where water pools.
If you’re replacing your current bottle or adding a dedicated daily-use option, you can see the Hyeta bottle on Amazon for a straw design that’s easy to keep in rotation with a cleaning routine.
Step 4 (Optional): Soak for stubborn odor or staining—only if appropriate
If you still see residue after scrubbing, a soak can help. Choose one option and follow conservative handling:
Compare before you buy
Check colors, sizes, and current price
Availability and colors can change, so it is worth checking the live Amazon listing before you decide.
- Soapy soak: A longer soak in warm soapy water is the most material-friendly option.
- White vinegar solution: Some people use diluted vinegar for odor control. Rinse extremely well afterward and avoid if your manufacturer advises against it.
- Diluted bleach solution: Some people use a very mild, properly diluted bleach soak for mold on non-porous parts. If you choose this route, rinse repeatedly until no odor remains and keep good ventilation. Avoid using bleach on parts that can absorb odors or degrade easily.
Important: If you don’t know your lid’s materials or the manufacturer’s guidance, stick to thorough soap-and-brush cleaning plus complete drying.
Step 5: Rinse thoroughly (then rinse again)
Rinse every component until there are no soap bubbles and no “slick” feel. Flush the straw by running water through it for several seconds.
Step 6: Dry fully—this is where most people slip up
Mold comes back fast when parts are reassembled wet. Use this drying protocol:
- Shake out water from the straw and lid
- Pat dry surfaces with a clean towel
- Air-dry disassembled on a rack (straws vertical if possible)
- Wait until parts are bone dry before reassembly and storage
If you need a bottle for work/gym that’s easy to keep clean with a consistent routine, compare current Hyeta colors on Amazon and consider keeping a second lid/straw set on hand so one can dry completely.
Remove mold from a silicone gasket (O-ring) safely
Silicone gaskets are frequent culprits because they sit in a damp groove and can hold onto odor. Here’s the safest, most practical approach:
- Remove the gasket (use a fingernail or a dull utensil—avoid sharp tools that can nick it).
- Wash and scrub the gasket with warm soapy water.
- Scrub the gasket channel in the lid thoroughly—cleaning the gasket alone isn’t enough.
- Rinse and dry completely before reinstalling.
If the gasket has a persistent smell, feels tacky, looks cracked, or keeps showing spots after cleaning, it’s usually time to replace it.
Clean vs replace: when you should stop trying to “save” the part
Some mold/odor issues are fixable. Others are a sign the material has degraded or absorbed odor/stains.
| Situation | Try cleaning? | Replace? |
|---|---|---|
| Light film or a few spots in straw/lid | Yes—disassemble, scrub, and fully dry | Not usually |
| Gasket channel has visible buildup | Yes—remove gasket and scrub channel | Only if gasket won’t clean up |
| Silicone gasket is cracked, stretched, or misshapen | No—cleaning won’t restore sealing | Yes |
| Persistent musty smell after a full clean + full dry | Try one additional deep-clean cycle | Yes if odor remains |
| Black staining that doesn’t change after scrubbing | Maybe (if you’re unsure whether it’s stain vs growth) | Often yes—especially for straws/gaskets |
| Repeated mold returns quickly (within days) despite proper drying | Re-check your drying and storage habits | Yes—consider replacing straw/lid/gasket |
Printable maintenance schedule (daily / weekly / monthly)
Use this as a simple rhythm to prevent water bottle lid mold from coming back.
Daily (or after each use if not just water)
- Rinse bottle and lid with warm water
- Leave lid open to air-dry (don’t seal moisture inside)
- If you drank anything other than water: wash lid and straw the same day
Weekly
- Fully disassemble lid (straw + gasket + valve, if removable)
- Scrub straw with a brush end-to-end
- Scrub gasket channel and underside of lid
- Air-dry all parts completely before reassembly
Monthly
- Inspect gaskets for cracks, stretching, or odor absorption
- Check straw for cloudiness, rough interior, or stubborn smell
- Do a deep-clean cycle if you notice any “off” taste or mustiness
Habits that prevent mold in a water bottle straw
- Don’t store your bottle sealed while wet. Let air circulate until everything is dry.
- Rotate lids/straws if you drink from a straw bottle daily—dry time matters.
- Avoid long “sipping windows” with sugary drinks. If you use mixes, wash ASAP.
- Don’t forget the gasket groove. It’s often the real source of recurring odor.
Recommended cleaning accessories (simple, worth it)
You don’t need a huge kit—just the right basics make straw lid cleaning faster and more consistent:
- A dedicated straw brush (correct diameter for your straw)
- A small detail brush for gasket grooves and hinges
- A drying rack area where small parts won’t get lost
If you’re building an easy-to-maintain daily setup, you can see the latest price on the Hyeta 32oz straw bottle on Amazon and keep your cleaning routine consistent from day one.
Conclusion
If you find mold in a water bottle straw or lid, focus on three things: full disassembly, mechanical scrubbing (especially the straw and gasket channel), and complete drying before reassembly. When parts are cracked, misshapen, persistently smelly, or repeatedly show mold despite proper cleaning, replacement is the safer, simpler call.
With a weekly deep clean and good drying habits, most straw-lid bottles can stay fresh and low-maintenance—without harsh chemicals or guesswork.