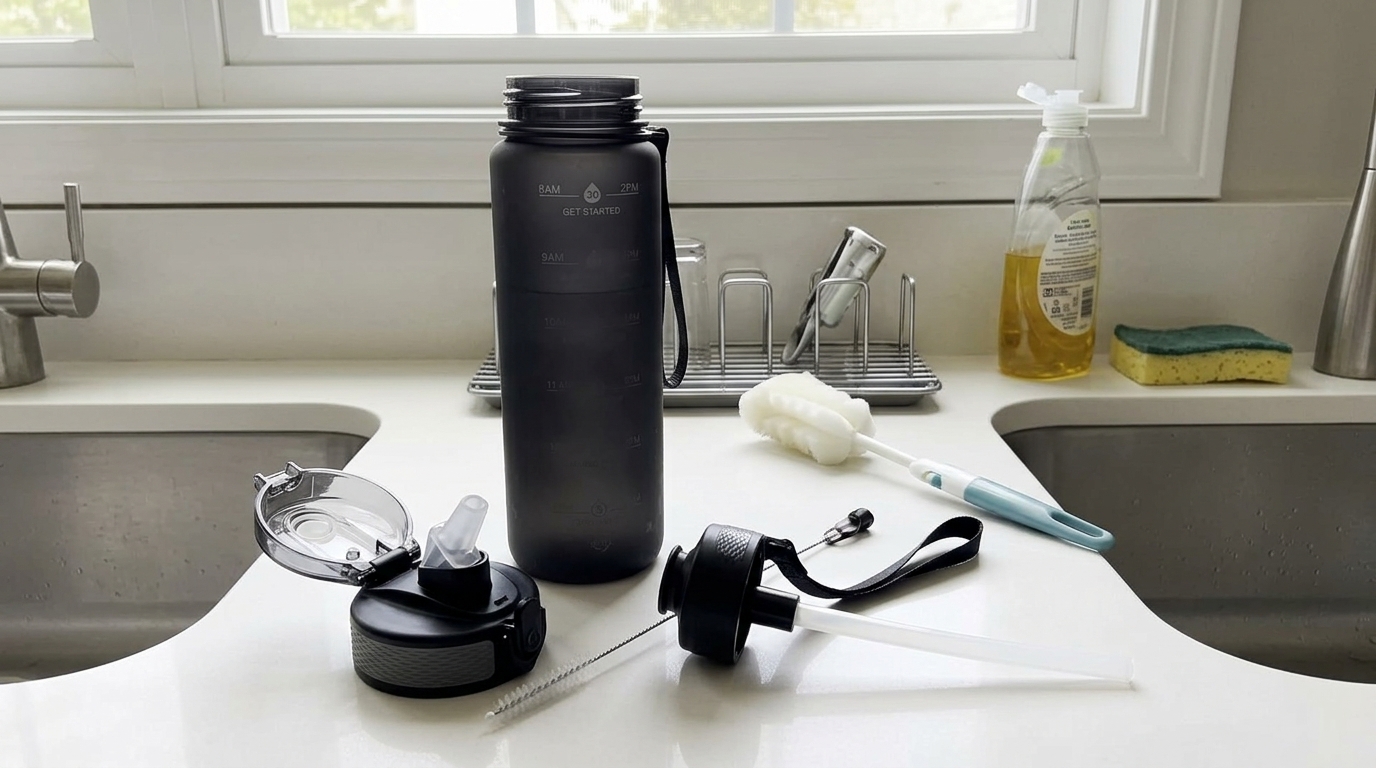
Straw-lid water bottles are convenient—until you catch that musty smell on the first sip. The good news: you don’t need a complicated routine. You need a consistent one that focuses on disassembly, scrubbing the narrow pathways, and drying completely so mildew doesn’t get a foothold.
Hyeta pick
A simple place to start
If you want a practical motivational water bottle with time markers, a straw lid, and a carry strap, compare the current Hyeta options before you choose a size.
Below is a practical, no-drama guide on how to clean a water bottle with a straw, including a fast daily reset, a weekly deep clean, dishwasher guidance, and the most common mistakes that cause odors to come right back.
Why straw lids get gross faster
Compared to an open-mouth bottle, straw lids have more parts and more hidden surfaces:
- Moisture traps: straw channels, mouthpieces, and gasket grooves can stay damp long after the bottle looks “dry.”
- Narrow pathways: the straw and valves are harder for water to flush through with enough force to remove residue.
- More nooks: seals (gaskets/O-rings) and hinge areas can hold onto odor-causing buildup.
That’s why the best approach is a two-speed routine: a quick clean after daily use, plus a deeper clean on a schedule.
Daily quick-clean routine (5 minutes)
If you do nothing else, do this. It prevents most “mystery smells” before they start.
- Empty and rinse right away. Don’t let the bottle sit capped and wet for hours, especially after gym sessions or travel.
- Wash with warm water + a little dish soap. Swish soapy water in the bottle, then scrub the mouth area and threads with a soft brush or sponge.
- Clean the straw path. Run warm soapy water through the straw/mouthpiece and use a straw brush if you have one (even a quick pass helps).
- Rinse thoroughly. Soap film can cling to straws and create an “off” taste.
- Air-dry completely. Set the bottle upside down on a rack. Leave the lid open and let the straw/mouthpiece area dry in open air.
If you’re shopping for a straw bottle you’ll actually use daily, you can check the Hyeta bottle on Amazon and look for a design that’s easy to disassemble and dry.
Weekly deep clean (10–20 minutes)
A weekly deep clean is what keeps the “musty” smell from creeping in, even if you’re good about daily rinsing. If you use your bottle heavily (gym, outdoor heat, flavored drink mixes), consider deep-cleaning more often.
Step 1: Disassemble everything you can
Take the lid apart as much as the manufacturer allows. Common removable parts include:
- Straw (top and/or bottom segment)
- Mouthpiece/sip valve
- Gaskets/O-rings (small rubbery seals)
- Any removable spout cover or flip-top components
Tip: If you’re not sure what comes apart, check your bottle’s care instructions. Don’t force parts that aren’t meant to be removed.
Step 2: Soak safe parts in warm, soapy water
Fill a bowl or sink with warm water and a small amount of dish soap. Let the lid parts and straw soak for 10–15 minutes. This loosens residue so brushing is more effective (and less frustrating).
Compare before you buy
Check colors, sizes, and current price
Availability and colors can change, so it is worth checking the live Amazon listing before you decide.
Step 3: Brush the straw and the “hidden” grooves
This is where odors typically live.
- Straw: Push a water bottle straw brush all the way through the straw several times, rinse, then repeat until the rinse water runs clear.
- Mouthpiece/sip valve: Use a small brush (or a clean, dedicated toothbrush) to scrub inside the opening and around any slits/valves.
- Gasket groove: Remove the gasket if possible and scrub the groove it sits in. A thin detail brush helps a lot here.
- Threads and creases: Scrub the lid threads and any hinge/flip areas where moisture collects.
Step 4: Rinse very well
Rinse every part under running water. Pay extra attention to the straw and valve areas—soap can get trapped and create a lingering taste.
Step 5: Dry like you mean it
Drying is mold prevention. Even a perfectly cleaned straw lid can smell musty again if it’s reassembled wet.
- Shake off excess water.
- Lay parts out separately on a clean towel or drying rack.
- Let everything air-dry fully (including inside the straw).
- Reassemble only when all parts feel dry to the touch.
If you want a bottle that makes daily use easy, you can see the latest price on Amazon for the Hyeta 32oz straw bottle and pick a style you’ll actually keep in rotation (because the easiest bottle to keep clean is the one you use consistently).
Dishwasher guidance: what “dishwasher safe straw lid” really means
“Dishwasher safe” can mean different things depending on the bottle and lid materials. In general:
- Top rack is safer: Lids, straws, and plastic parts can warp if they sit too close to the heating element.
- Small parts can get lost: Gaskets and valves may fall through racks or end up in the filter if not secured.
- Heat can shorten seal life: Frequent high-heat cycles may speed up wear on rubbery seals over time.
When the dishwasher is a good option
- You can fully disassemble the lid and place parts securely on the top rack or in a utensil basket.
- You’re running a normal cycle (not a high-heat sanitizing cycle) and the manufacturer says the parts are dishwasher safe.
When to hand-wash instead
- The lid has complex valves or hard-to-secure tiny pieces.
- You’ve had repeat odor issues—hand scrubbing the straw and gasket groove usually solves what the dishwasher misses.
- You notice seals getting loose, cloudy, or less flexible after frequent dishwashing.
For many people, the best system is a hybrid: dishwasher for the bottle body when appropriate, and a quick hand-scrub for the straw and mouthpiece to ensure the narrow passages are actually clean.
How often to wash a reusable water bottle
| Use case | Quick-clean | Deep clean |
|---|---|---|
| Plain water, daily use | Daily | Weekly |
| Gym / heavy sweating environment | After each use | 1–2× per week |
| Flavored drinks, electrolyte mixes, smoothies | After each use | 1–2× per week (or more if odors appear) |
| Travel days (bottle sits closed for hours) | Same day | Weekly (don’t skip drying) |
Mistakes that cause musty smells (and how to avoid them)
- Reassembling while wet: Let every piece dry separately before putting the lid back together.
- Never removing the gasket: Odors often live under seals. If it’s removable, take it out for weekly cleaning.
- Rinsing only (no soap): Water alone won’t reliably remove oils and residue in a straw pathway.
- Skipping the straw brush: A quick pass through the straw is one of the highest-impact steps.
- Letting it sit closed in a bag: Warmth + moisture is the perfect environment for stink. Open and dry when you get home.
Quick checklist: clean straw lid water bottle
- Daily: wash bottle + lid with dish soap
- Daily: rinse and brush the straw pathway
- Daily: air-dry with lid open
- Weekly: disassemble lid (including gaskets if removable)
- Weekly: soak + scrub gasket groove and mouthpiece
- Weekly: dry every part fully before reassembly
Helpful tools to keep on hand
You don’t need a huge kit, but a couple small tools make cleaning faster and more thorough:
- Straw brush: sized to your straw diameter
- Small detail brush (or a dedicated toothbrush): for gasket grooves and mouthpiece corners
- Drying rack: so parts can dry with airflow
Bottom line
If you’re dealing with a musty smell, it’s usually not the bottle—it’s the straw path, mouthpiece, or gasket groove holding onto moisture and residue. Stick to the daily quick-clean, do a weekly deep clean with full disassembly, and make drying non-negotiable.
If you’re ready for a fresh start with a straw bottle you can build a routine around, you can compare current colors on Amazon for the Hyeta 32oz straw bottle and choose one that fits your day-to-day (work, gym, travel, or all three).
Note: If you ever see visible mold, strong persistent odors after deep cleaning, or damaged seals, consider replacing the affected parts (like the straw or gasket) per the manufacturer’s recommendations.